Hello guys, your data have been deleted formatted, lost due to partition from pen drive or hard drive accidentally. But you are not able to recover them, and after that you feel unhappiness and irritating. Because your all data have been lost, or deleted from pen drive or hard disk , even your pen drive has been crash but you want to also recover important files .Now you don't worry In this post I am telling u that how to recover all important data due to deleting, formatting, partition loss, improper operation etc. Recover whatever you lost, such as pictures, videos, audio, emails, documents by using some tools very easily. On various website many types of software are available but they don not work but I am giving you best software where u can recover easily and make your life smiley again.
Method -1
Recover deleting, formatting, partition loss, improper operation etc. from EASEUS Data Recovery software.
STEP-1 Firstly download EASEUS Data Recovery Tool.
Dropbox Link
4shared Link
STEP-2 After download EASEUS Data Recovery Tool, install and run the application in your
system. you can see look likes that.
EASEUS Data Recovery Tool are used for Recover the data due to Deletion, Format, Partition Loss, Software Crash, Virus attack, etc.
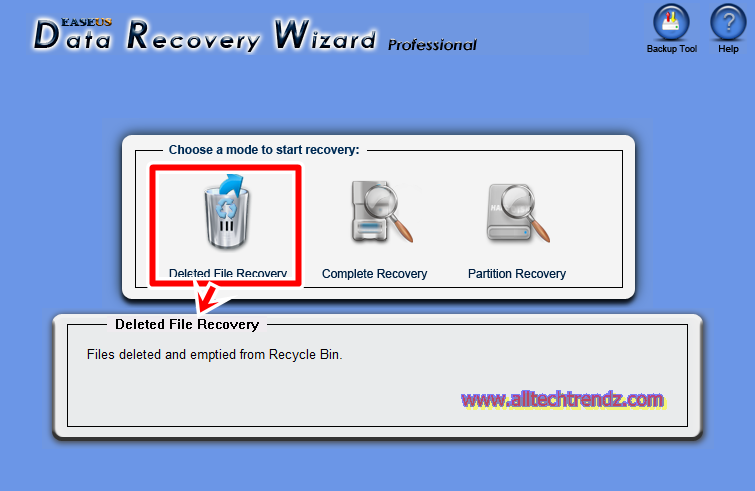
STEP-3 After Run the application You can see Three mode recovery.
Mode -1 Deleted File Recover
Deleted file recovery mode are used for recover if files Deleted and Emptied from Recycle bin.
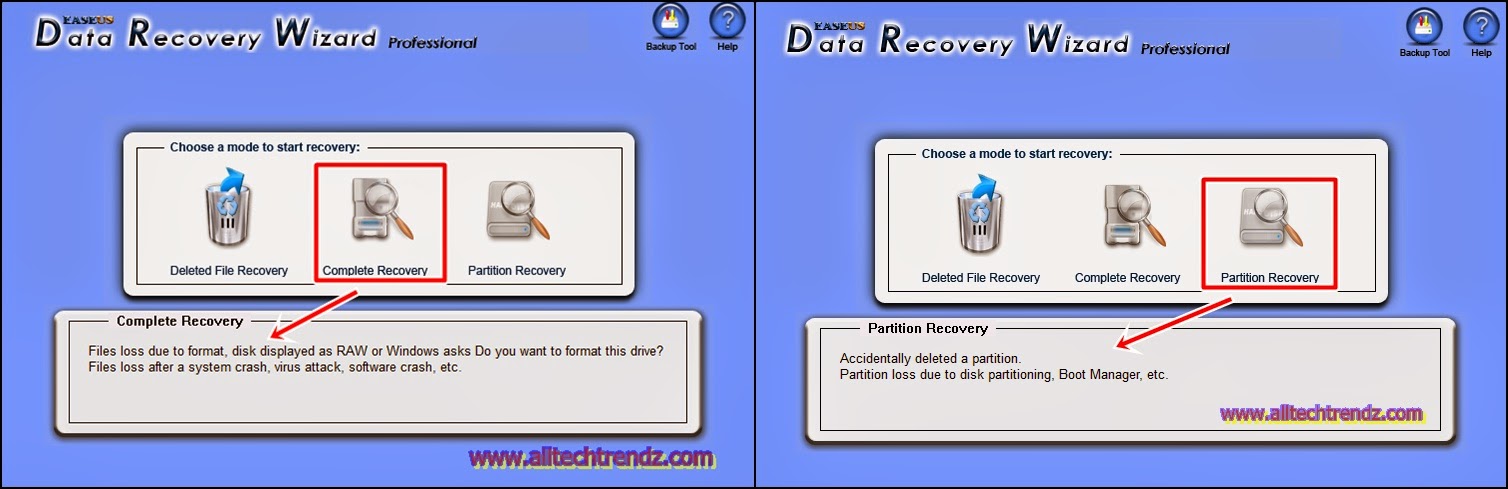
Mode -2 Complete Recovery
Complete Recovery mode are used if Files loss due to format, Disk displayed as RAW or Windows asks, Do you want to format this drive? , Files loss after a system Crash, Virus attack, Software crash, etc.
Mode -3 Partition Recovery
Partition Recovery mode are used if accidentally Deleted a Partition, Partition loss due to Disk partitioning, Boot Manager, etc. You can see the screenshots of all three mode.
 |
| Deleted File Recover |
 |
| Complete Recovery Partition Recovery |
STEP-4 Now Plug your flash Pen drive that you want to recover files which has been deleted. and After that Click on Complete Recovery Mode .
STEP-5 After click on Complete Recovery Mode you can see a window where you can choose the files types that you want to Recover. If u want to Recover all type of files then Check [ Search for all "Lost File" types]. And if not then uncheck [search for all "Lost File" types]. and select manually. And also if you want to skip "Ignore bad sectors" then uncheck and if u want then check.
Now click on "NEXT" button. [See as its below Screenshots]
STEP-6 After click "NEXT", you can see the all drives where you can select which drive you want to recover data from drives. In this post I am selecting a flash drive for recover data,you can also select a hard drives if you want to recover data from hard drive.And after that click on "NEXT" button.
STEP-7 After click on "NEXT" button all data will be search from your Flash drive which are deleted or formatted., and again click on "NEXT" button after that your all data will be build which are search from flash drive. and after that click on "NEXT" button
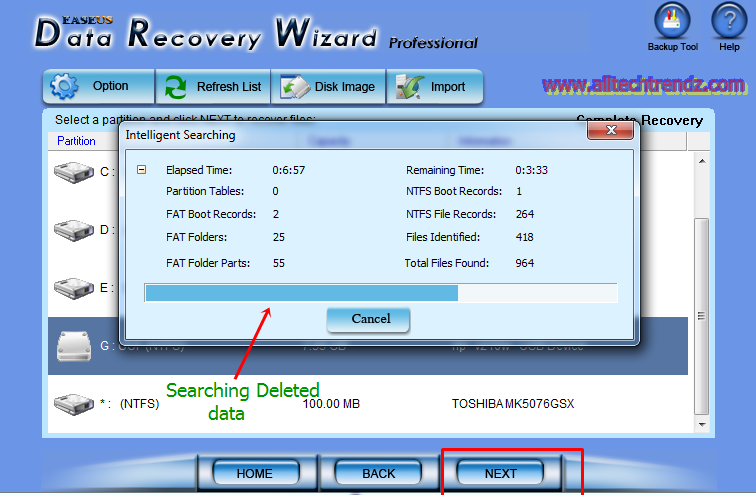 |
| Searching Data |
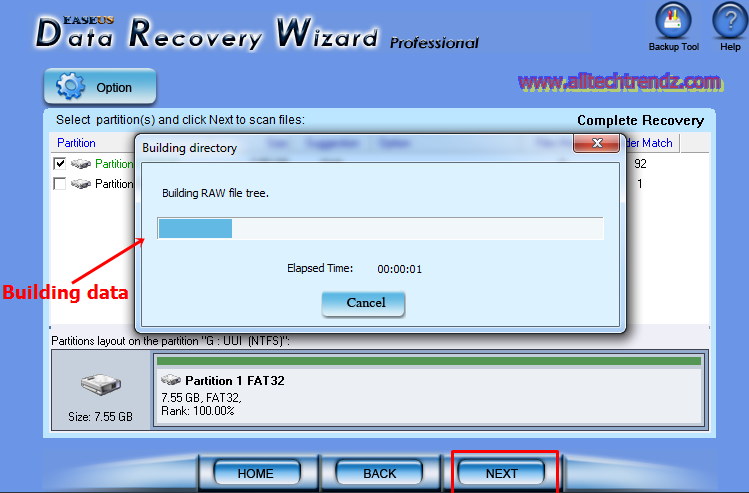 |
| Build Raw file |
STEP-8 Now you can see all deleted or formatted files which had been deleted accidentally, Now time to recover data or files . before doing this you will be select files which you want to Recover them.Also you can see a preview of deleted files, just right click on deleted files and click on preview. and after that click on "NEXT" button.
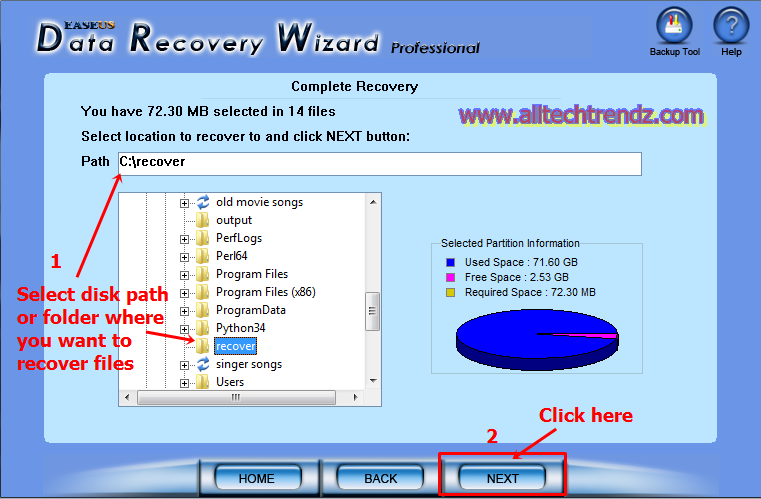
STEP-9 Now time to save deleted file. Before doing this select a path or folder directory where you want to save the files or data. After that click on "NEXT" button.
STEP-10 Now your all data are going to recover.
I hope your all data has been successfully recovered and felling happiness.
Method -2
Method -2 is the same as
Method -1, in this method you can use
Recuva tools for recover deleted data.
1. Download Recuva tool from
here.
2. Install and run the application.
3. Choose the specific file. and click on Next button.
4. After that select the location of drive or folder, where you want search.
5. And after that click on "Next" Button and Enable deep scan if u want to scan deeply and click on "Start" button.
6. After that scan will be start and file will be build.
7. Now check the file which you want to recover and click on "Recover" button.
8. Now time to save the file , first choose the location of path or folder where you want to save the file after that click "OK" button.
In these two method I hope your all data has been recovered. and Now your feeling is good. Even if you have any problem then you can leave a comment below, we will get back to you immediately. (.-.)


.png)
.png)


.jpg)


.jpg)
